HSU Configuration - Datasource

HSU I/O Settings
There are two groups of settings, one for the Channel 0, and one for the Channel 1. To change the Bit Rate, Parity, word Length or number of Stop bits, click on the down arrow next to the setting box and choose an option from the list. For Bit Rate, you can either choose a listed rate or enter a rate. After entering the settings for Channel 0, click the Copy CH0 button to apply the same settings to the Channel 1 row.
|
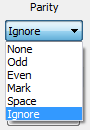
Specifies the expected packet parity, or whether to Ignore the parity. |

|
The number of data bits in the expected packet. 8 Bits is the default. |

|
The number of data bits held in the mark (logic 1) condition at the end of the expected packet. |

|
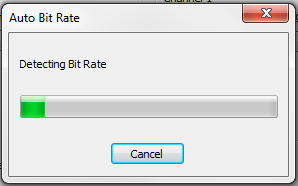
When the Auto Bit Rate button is clicked the the Auto Bit Rate dialog will open while ComProbe HSU hardware attempts to automatically determine the bit rate. A bar graph will appear to show the detection progress. |

|
After setting Channel 0, click the Copy Ch0 button will copy the channel 0 settings to channel 1. |

|
When check will change the logical polarity of the data stream from the device under test. |

|
Displays the maximum bit rate for the computer that the HSU hardware is connected to. |

|
Used in conjunction with Multiple Bit Rates; see discussion below. Will appear only if Multiple Bit Rates is checked. Specifies that the bit rates will change in ascending order. |
Click the OK button.
Some implementations call for changing the bit rate mid-stream. If your device does this, click the Multiple Bit Rates checkbox and you may enter up to three different bit rates, each in sequence:

HSU I/O Settings - Multiple Bit Rates
In the example above, the ComProbe HSU would start capture at 115.2 kbps, and then move to 230.4 kbps, then to 460.8 kbps.