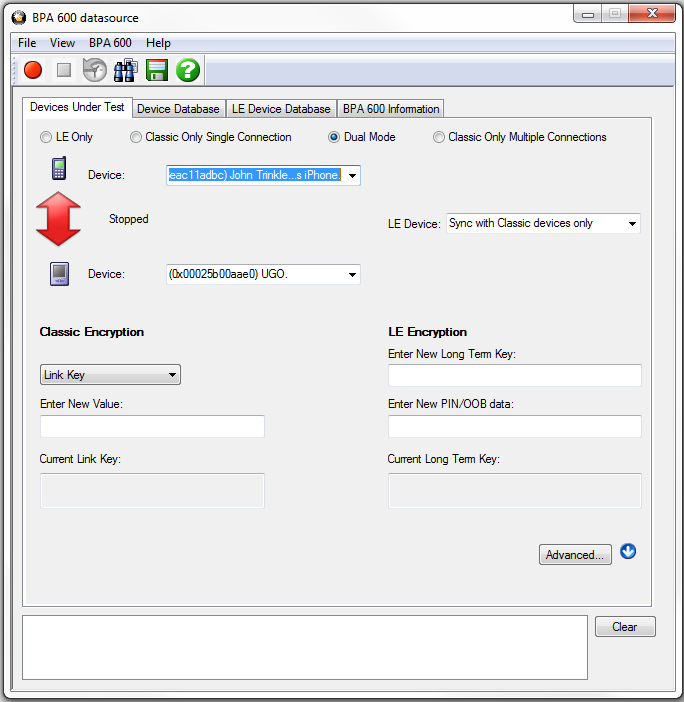
BPA 600 Devices Under Test- Dual Mode
There are four ways to sniff Bluetooth® wireless technology communications using the ComProbe BPA 600 Dual Mode Bluetooth Protocol Analyzer. You choose the mode you will be using by selecting one of the following radio buttons on the Devices Under Test tab in the BPA 600 datasource dialog:
Note: When selecting and using either "Dual Mode" or "Classic Only Multiple Connection" you must connect both antennas (LE and Classic) to the ComProbe BPA 600 hardware.

BPA 600 Devices Under Test - Dual Mode
Specifying the Bluetooth Device Address (BD_ADDR)
In Dual Mode, the analyzer needs to know the Bluetooth Device Address (BD_ADDR) for each device, but it does not need to know which is master or slave for the Classic Bluetooth connection, ComProbe analyzser can figure that out for you through roleless connection.
-
 You can manually select Select the Bluetooth device address (BD_ADDR) form the Classic Device: drop down list or from the Device
Database. You
can also type in the address as a 12 digit hex number (6 octets). The "0x"
is automatically typed in by the control. Any devices entered this way
is added to the Device Database.
-
 Specify the "BD_ADDR for the LE Device" by selecting "Sync with Classic Devices Only". By doing this, the low energy device will follow connections from or to the specified device, or from or to the first Classic device that connects over LE.
Classic Encryption
Bluetooth 

There are three encryption options in the I/O Settings dialog.
- PIN Code (ASCII)
- PIN Code (Hex)
- Link Key
-
The first and second options use a PIN Code to generate the Link Key. The devices generate link Keys during the Pairing Process based on a PIN Code. The second Link Key generated from this process is also based on a random number so the security cannot be compromised. If the analyzer is given the PIN Code it can determine the Link Key using the same algorithm. Since the analyzer also needs the random number, the analyzer must catch the entire Pairing Process or else it cannot generate the Link Key and decode the data.
Example:
If the ASCII character PIN Code is ABC and you choose to enter the ASCII characters, then select PIN Code (ASCII) from the Encryption drop down list and enter ABC in the field below.
If you choose to enter the Hex equivalent of the ASCII character PIN Code ABC, then select PIN Code (Hex) from the Encryption drop down list and enter 0x414243 in the field. Where 41 is the Hex equivalent of the letter A, 42 is the Hex equivalent of the letter B, and 43 is the Hex equivalent of the letter C.
Note: When PIN Code (Hex) is selected from the Encryption drop down list, the 0x prefix is entered automatically.
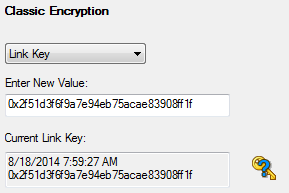
- Third, if you know the Link Key in advance you may enter it directly. Select Link Key in the Encryption list and then enter the Link Key in the edit box. If the link key is already in the database, the Link Key is automatically entered in the edit box after the Master and Slave have been selected. You can also pick Choose Pair from Device Database to select a Master, Slave and Link Key from the Device Database.
- Select an Encryption option.
-
Enter a value for the encryption.
The Current Link Key field displays the currently provided Link Key and the date and time the key was provided. The status of the Link Key is displayed with the following icons:
Icon Link Key Status Valid Not Valid 
Connection Attempted But Failed
LE Encryption
-
Enter the New Long Term Key for the LE Encryption.
The long term key is similar to the Link key in Classic. It is a persistent key that is stored in both devices and used to derive a fresh encryption key each time the devices go encrypted.
Note: If you use Copy/Paste to insert the Long Term Key , Frontline will auto correct (remove invalid white spaces) to correctly format the key.
-
Enter a PIN or out-of-band (OOB) value for Pairing.
This optional information offers alternative pairing methods.
Click here to see how to capture data after completing the configuration.

